 remember the first time I tried free motion quilting, sometimes called stippling. I have never been a true quilter. I don’t have the patience to carefully cut out all those little squares. Plus, I like to finish my projects a lot quicker. (Maybe that’s why I chose the alterations/embroidery business.)
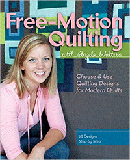 I still wanted to learn how to do the free motion stitching. I had the bright idea of having my children write their names (they were in grade school) and I would use my newly learned free motion skills to “embroider” by free motion, along with the little letters my children and my niece scribbled on a piece of muslin. It was a great success, even though I had never done it before. I was very surprised at how easy it was done. Their little names, in their own scribbled handwriting, were adorable and turned out to be great keepsakes.
Turning Mistakes Into Something Beautiful
Later, when my children had children, I had taken a few more sewing classes and was working on a project for my granddaughters. I was making a little soft-sided case for them to carry a little doll in. As the case was opened there was a doll bed to hold the doll (it was actually a pocket to slip the doll in). I was still learning to embroider and was not happy with the job I did on the background of the “doll’s bed”. It was a little wrinkled around the embroidery. So, I decided that instead of throwing it away I could use my free-motion skills to stipple it and the other wrinkles wouldn’t be so noticeable. The doll case was several layers, including a thin layer of batting, so it was perfect for the stippling.
It seemed a lifetime had passed since I tried free motion work and I felt unsure of myself. I had actually never worked on anything very big. My project this time was about 10″x12″ which doesn’t sound very big but it was big enough to make me wonder if I would ruin my project or make it look better. So, I did that thing where I hold my mouth a certain way and away I went. I lowered my feed dogs and “put the pedal to the metal” as they say. I just put both hands on that piece of embroidered fabric and started twisting and turning (the fabric, not myself). It was so easy and so much fun. When finished, it actually looked like I planned it that way. I never told anyone it started out as a mistake.
Live A Little
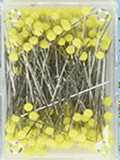
1 3/8″ Glass Head Pins
Free motion quilting or free motion embroidery is really fun. It is easy enough for a beginner as long as you are careful about keeping your hands far enough from the needle. You simply place your fabric piece under the presser foot, feed dogs down, and begin to sew and move the fabric up and down and around in any way you want. There is really no set way to do it. You can be very creative and design your own pattern as you go, or you can just let go and have fun.
It takes a little practice to get used to moving the fabric and if you have a one-track mind as I do, I have to really concentrate at moving my hands and stepping on the machine pedal at the same time! You also will spend a little time learning how to control the speed of the machine so that your stitches are at least close to the same size. Otherwise, you may come out with some short and some long stitches. But, in all, you can get the hang of it in less than an hour.
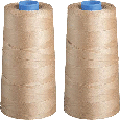
Order Quilting Thread
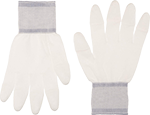
Get A Grip With Machingers Gloves
Free Motion Quilting and Embroidery is fun, fun, fun. You’ll never get tired of creating beautiful projects. It will take a little practice because you will have to learn to control the fabric in order to move it the way you want. But, that’s what makes it fun! The Machinger Gloves pictured here help you to get a better grip on the fabric, making it easier to move in any direction as you sew. They give that needed grip to push several layers of fabric through the machine if you need to quilt through multiple layers.
Now You Try
Go into your fabric stash and get two pieces of fabric and a piece of thin batting. Cut them all the same size and make a sandwich with the batting in the middle and the other two pieces with wrong sides toward the batting. Baste around the edges or use some 505 Adhesive Spray to hold your fabrics together. (There are even some battings that can be ironed on to the fabric – click here for Quilting Batting supplies.) Once your “sandwich” is ready, and your machine’s feed dogs are lowered, place your fingers on the fabric so that you can move it freely to create the design you want.
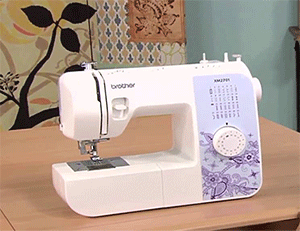
Watch A Demonstration of Free Motion Quilting Here
Sometimes watching the process in action makes attempting it a whole lot easier. Watch here as Patsy gives you a demonstration of how it’s done: