Creating a Place Where Creativity Flows
Have you ever sat down to sew, only to realize you’re spending more time digging through piles of fabric and tangled thread than actually sewing?
I’ve been there more times than I care to admit — and trust me, nothing takes the joy out of a creative afternoon faster than a messy, stressful workspace.
Over the years, I’ve learned that having an organized sewing area isn’t just about keeping things tidy; it’s about giving yourself the freedom to create without chaos. Whether you sew in a full-sized craft room, a corner of the living room, or a converted closet, setting up your space to work for you is a game-changer.
Let’s talk about some real-life, doable ways to organize your sewing space — and keep it organized — so you can spend more time stitching and less time searching.
Start with a Clean Slate (Literally)
First things first:
Take everything out. Yes, everything. It’s hard to reorganize when you can’t even see what you have.
Lay it all out — fabric, scissors, rulers, thread, patterns — and take stock.
This is your chance to:
- Toss anything broken, dried out, or beyond repair.
- Donate or gift fabric you know you’ll realistically never use (be honest — if you didn’t love it when you bought it, you’re not going to love it any more five years later).
- Group like items together so you can see what storage solutions you really need.
It’s amazing how a fresh start can breathe new life into your creativity.
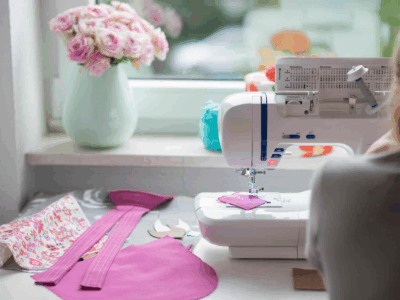
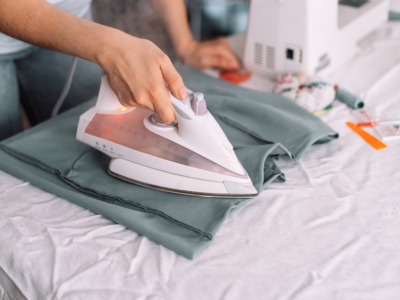
Think Zones, Not Just Storage
One of the best changes I ever made was to set up zones in my sewing space. Instead of putting all my supplies wherever they fit, I grouped them based on how I actually use them.
Here’s a simple way to think about it:
- Cutting Zone: Cutting mats, rotary cutters, rulers, scissors.
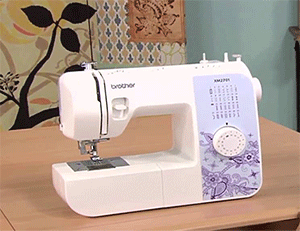
- Sewing Zone: Machine, threads, needles, bobbins, presser feet.
- Pressing Zone: Iron, ironing board, pressing cloths, spray bottles.
- Planning Zone (Optional): Sketch pads, patterns, inspiration boards.
You don’t need huge spaces for each zone, but having a logical flow makes everything easier. (And yes, if you’re short on space, your ironing board might fold down from the wall or your cutting mat might share a desk — that’s totally fine!)
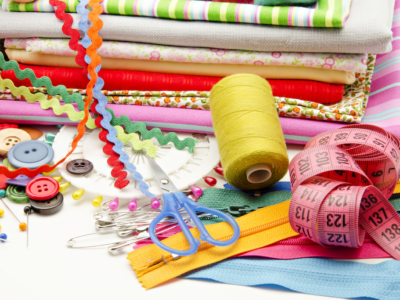
Smart Storage Solutions You’ll Actually Use
Forget those Pinterest-perfect rooms that cost a fortune. You can organize beautifully without breaking the bank.
Some of my favorite practical ideas:
- Clear bins or drawers: If you can see it, you’re way more likely to use it.
- Pegboards: Hang scissors, rulers, threads, or even little baskets for zippers and buttons. It’s vertical magic!
- Rolling carts: These are a lifesaver if your sewing space is multipurpose. Roll it out when you’re sewing, and tuck it away when you’re done.
- Magazine holders: Great for keeping patterns upright and easy to flip through.
- Small jars or containers: Perfect for buttons, snaps, and other small bits and bobbles.
And one tip I swear by: Label everything. Even clear bins. After a few months, your brain forgets where you lovingly placed all those bobbins.
Dealing with Fabric Overflow
Oh, fabric. Our greatest joy… and our greatest organizational challenge.
If you’re like me, your fabric collection grows faster than your ability to sew it.
Here’s what helps:
- Fold and store by color or project type. This makes matching fabric to patterns a dream.
- Use comic book boards or cheap cardboard to “file” your fabric upright. It looks neat, saves space, and makes every piece visible.
- Keep a “current projects” basket. Only fabrics you’re actively working with go here — everything else stays in the stash until you’re ready.
If you notice you’re buying fabric faster than you’re sewing it (no judgment — I get it!), consider a fun challenge like “Sew Five Before You Buy.” It helps keep the clutter under control.
Make It Pretty — You Deserve It
Don’t underestimate the power of a beautiful, inviting space. Even small touches can make a big difference:
- Hang up a few sewing-themed prints or inspiration boards.
- Add a cozy chair or a fun rug.
- Use a mug you love to hold your scissors and pens.
- String some fairy lights if you want a little extra magic!
When you feel happy just being in your sewing space, you’ll naturally want to keep it neat and ready for your next project.
Give Yourself Grace
Last but not least, remember: Your sewing space is for YOU.
It doesn’t have to be Instagram-perfect. It doesn’t have to stay perfectly organized every day. Life happens, projects get messy, and that’s okay.
The goal isn’t perfection — it’s to create a space that helps you feel inspired, peaceful, and ready to bring your ideas to life.
If you’ve recently re-organized your sewing area (or you’re planning to), I’d love to hear about it! Drop a comment below and tell me your favorite organizing tip — or what part you’re struggling with.
We’re in this together, sewing friends. ❤️ 🎀