 While reading sewing machine reviews I noticed many first-time buyers or new sewists get frustrated when a machine doesn’t do exactly what they want it to do out of the box. That is probably because as simple as a sewing machine looks, there are important and sensitive settings that need to be right for a machine to sew properly on different fabrics and materials. Understanding these basic settings is important before you’ve built that nest of thread under your fabric!
We will start with basic settings and will visit some of these in more detailed posts and link them here as they are completed. Rose has an excellent piece on adjustable presser foot pressure and I will link to it again below in the proper section. You can compare settings available on the different sewing machines we’ve reviewed at this link.
Stitch Selection
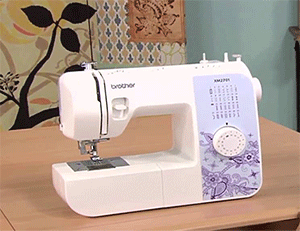
Whether you own a machine with hundreds of stitches or just the basics, you should know how to set your stitches. Many older machines and some more basic mechanical machines use a knob or levers for stitch selection. The stitch is typically illustrated on the machine or the knob or dial and stitches are easy to change.
Newer machines with a small number of stitches may have them illustrated on the face of the machine with push button selection. Again, this is an easy way to select the desired stitch. Machines with a large number of stitches may have some or all of them illustrated on the face of the machine, but each stitch typically does not have its own individual button. Instead, selection arrows are used to move through the stitches until you find the one you want to use. Some machines with a large number of stitches will have individual selection buttons for the most popular stitches and then arrow selection for the remainder of the stitches.
Stitch Width
Stitch width is important for zigzag and decorative stitches. Combined with stitch length it can turn a simple loose zigzag stitch into beautiful satin embroidery. Many machines with a higher price point have stitch widths as wide as 7mm. This can create an eye-popping satin stitch. Stitch width is typically controlled by a knob or lever on the front of the machine. Setting the control to a lower number will make more narrow stitches and setting to a higher number will make wider stitches.
Stitch Length
Stitch length is important not only for smooth, taut seams, but stitches of different lengths have different purposes. Shorter stitches are typically used in decorative stitches or for making buttonholes. Longer stitches are used for basting or making gathers. To set for shorter stitches turn the knob or set the control to a lower number and for longer stitches set to a higher number.
Thread Tension
Thread tension can be intimidating since changing both thread type and fabric can require adjusting tension. An easy way to tell if tension is off is too look for bunched threads, loops or knots. Upper and lower threads are meant to lock together for a secure seam. You should not see the upper thread on the underside of the fabric, nor the lower thread (from the bobbin) on the upper side of the fabric. If you do, it is time to adjust thread tension.
When the lower (bobbin) thread shows on the upper side of the fabric either the bobbin thread tension is too loose or the upper thread tension is too tight. If the upper thread shows on the under side of the fabric, the reverse is true – either the upper thread is too loose or the bobbin thread is too tight. On many machines, upper thread tension is automatic and thread knots, loops and tangles are an indication it is time to have your sewing machine serviced.
Presser Foot Pressure
I will keep this very basic because Rose goes to it in great detail in another post on this site. Presser foot pressure refers to the amount of pressure applied by the presser foot to hold the fabric agains the feed dogs as they move the fabric under the needle. Thinner fabrics require more pressure and thicker fabrics require less. Many sewing machines have automatic adjustment for this setting. For those with manual adjustments, please read the post linked above.
Sewing Speed
This button has saved many of my projects. Before I could slow the sewing speed, I tended to be a little heavy on the foot pedal. I would sew much too fast, which caused some very crooked seams. On many machines this is a slide selector and you often find three speeds. Once it is set, that is the fastest speed you will be able to sew with the foot pedal. No more lead feet and crooked seams!
Needle up / down
A needle up / down setting is found on newer machines and is usually controlled by a button on the front of the machine. Being able to set the needle to land in the down position so that it pierces the fabric makes it much easier for those working on applique or small piecing projects who will be pivoting the fabric as they sew.
Sewing machines with this feature include the Singer 7258 Stylist, and the Brother PC-420 PRW.
Reverse Stitch
Before machines were equipped with reverse stitch, we had to pivot our fabric and sew back over our seams to lock them in. Now with the push of a button you can lock in your seam without moving your fabric. The reverse sewing button is typically found on the front of the machine with other controls.
Needle Position
This setting is automatic on my machine and the others that I’ve tried out for our machine reviews. The machine repositions the needle left, right, or center based on stitch selection and presser foot used. Machines will sometimes fail to reposition the needle when you change back to a straight stitch from zigzag or decorative stitches. If this happens, unplug your sewing machine and wait about five minutes. This should help reset the needle position. It is also a good idea to check your manual for its recommendations.


